
MIDI integration is notoriously lacking in Ableton Live. For example, you can’t store SysEx data at the start of a song (i.e. to store a patch dump), you can’t automate CCs in the Arrangement view, etc. Couple this with some of the other caveats of dealing with hardware (latency, MIDI timing errors, drop-outs) and it can make for a very frustrating experience.
But we love Ableton Live and want to get the most out of it, so in this post I will explore some options to tighten up timing, automate your external hardware seamlessly from the Arrangement view and generally have a much more enjoyable experience when working with MIDI devices.
Timing is everything
The first thing you should do if you haven’t already is set your Driver Error Compensation. Contrary to some other articles on the internet this is not simply a matter of entering a negative value to reduce your Overall Latency to 0ms!
 |
| Wrong way! |
Rather, what you are trying to do is tell Live how “truthful” your audio interface is being about latency. Doing so will allow Live to automatically compensate for delay more accurately (more on this later).
Ableton includes a tutorial and sample project that will help you set this value properly. To access it:
- From the top menu: View -> Help View
- In the Help section, “Show all built-in lessons”
- Select “Driver error compensation”
- Follow the steps
Note that you should repeat the above steps whenever you change your audio interface or Buffer Size.
Take Control
When I first started incorporating hardware into Live I was doing things the “hard way”: creating separate MIDI and audio tracks and then recording the audio signal from my synths before doing a final mixdown/render. There are some advantages to this,
such as being able to warp/process the audio, but the downside is that all delay compensation needs to be
done manually.
The “right” way to incorporate hardware (as of Live 7, I believe) is to use its respective devices/instruments: External Instrument and External Audio Effect. These instruments will take care of several things for you:
Firstly, they will account for latency. If you’ve properly set your Driver Error Compensation per the above you should have almost no latency relative to your soft-synths and audio tracks. Basically, what Live is doing is delaying everything else to give your synths time to catch up.
You will notice that these instruments provide a Hardware Compensation value: this is to account for actual hardware latency (i.e. the amount of time it takes your synth to respond to a note, MIDI I/O)
Secondly, these devices will take care of recording the output from your hardware automatically when you bounce your track:
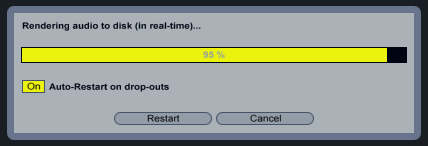 |
| Real-time rendering |
Unfortunately, what these Live devices don’t provide is a way to automate CCs from within the Arrangement view. There are three possible approaches to this, described below.
Clip envelopes
This is the “default” way of working with CCs in Live. Unfortunately, you can’t “see” clip envelopes on the Arrangement view nor can you name the CCs.
 |
| Where are you going with this… ? |
So let’s say you’re trying to create an epic acid line rise/fall. All you can really tell from the clip view is that “MIDI CC 74 is climbing towards bar 64”. This doesn’t cut it for me. To me, clip envelopes only really make sense for modulation and pitch bend, and that’s all I will use them for. Moving on…
VSTs
There are several VSTs out there that allow you to control specific hardware devices (both my DSI Tetra and Little Phatty have VSTs, for example). These work by taking control of your MIDI I/O on behalf of your DAW. So when Live sends a “note on” to the plugin, the plugin will the relay this to the hardware. And vice versa.
Because these VSTs generally provide controls for all of the synth’s parameters (cutoff, resonance, etc.) it means you can automate them in the same manner as you would other virtual instrument parameters. In other words, you can automate them from the Arrangement view! As an added bonus, these plugins generally store the “state” of all parameters, so when you reload your project you will get the same patch (even if it’s not saved as a patch on the synth)
 |
| Little Phatty VST |
The main caveat with these plugins is that, because they take control of MIDI I/O, you can no longer use Live’s External Instrument device.
There is a workaround involving loopbacks/virtual MIDI ports, but a far simpler workaround is to simply use Live’s External Audio Effect and only choose an input channel. This will force Live to perform real-time rendering, however, it will no longer automatically compensate for latency so you will need to apply a negative track delay on your MIDI track (see “Tighten Up” below).
Note that if a VST doesn’t exist for your hardware there is an open-ended plugin called CTRLR that’s worth checking.
Tighten up
As I mentioned earlier, Live’s External devices allow you to enter a Hardware Delay. Assuming you aren’t using a VST to control your hardware then you can use this to tighten up timing even further. (If you are using a VST you will need to use a negative track delay on your MIDI track, but otherwise the below applies)
The process for identifying your Hardware Latency is the essentially the same process as determining your Driver Error Compensation. Here are the steps I used:
- Load a patch with an instant attack on your hardware device (basses or kick drums are good)
- Sequence a couple notes in your MIDI track (say, beats, 1, 2, 3 & 4)
- Render the project to WAV
- Drag the audio track into a new channel in Live and turn off warping
Look at the waveform produced by the synth: does it line up with the 1, 2, 3 & 4 beat markers? In my case it didn’t.
 |
| Test loop with audio for comparison |
Edit the bounced audio clip and adjust the right-most digit until it lines up. This value is the value for your Hardware Latency, or negative track delay (edit Sept 2013: one thing to keep in mind with track delays is that they affect playback, not recording, therefore you would need to include an extra bar before your MIDI phrase to ensure that the full audio gets captured when the track is rendered or frozen)
 |
| Adjusting clip start point |
Re-bounce the audio and everything should line up now. Perfect timing!
Update September 2013: I’ve written a similar blog post for Sonic State that provides some additional thoughts on using Instrument Racks and Max4Live to automate CCs from the arrangement view. You can check it out here