AudioPlayer.setup(“http://snugsound.com/blog/player/player.swf”, {
width: 290
});
So I flip-flopped on the format for the second instalment of Fruity Candy. I contemplated doing a screencast, but then realized that I generally don’t like to listening to the sound of my own voice, and the prospect of trying to record several minutes of it would likely result in me ripping out my hair. So for now it’ll just be another article, the topic of which is drum programming tricks.
I’m sure there are dozens if not hundreds of tutorials out there on this topic, but what I hope will set this one apart is some of the personal techniques I’ve developed. Most of what I cover here will apply to pretty much any DAW/sequencer, but the actual implementation will of course be specific to FL Studio (9).
Preface
This article assumes you’re working directly with drum samples, sampled from records, drums machines, etc. If you’re working with a drum plugin, like the excellent Addictive Drums, then many of these techniques won’t apply. Similarly, if you’re working with multi-sampled drum hits from a real kit then some of the techniques will be less relevant.
Dynamics/movement
One of the most important techniques of programming electronic beats is creating good dynamics/movement. A lot of this comes from hihat programming and ghost notes. I’ll start with the former.
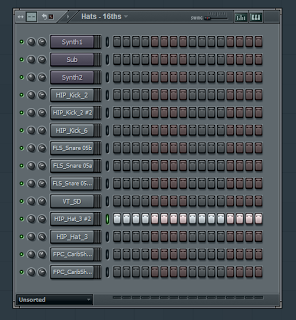
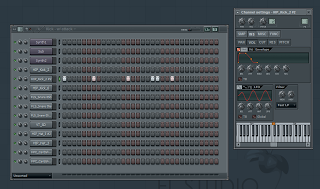
A steady stream of 16th note hihats sounds more like a broken machine gun than a component of a drum beat. There’s no movement or dynamics at all:
AudioPlayer.embed(“audioplayer_1”, {soundFile: “http://snugsound.com/blog/fruity-candy-2/01%20Hats%20-%2016ths.mp3”, noinfo: “yes”});
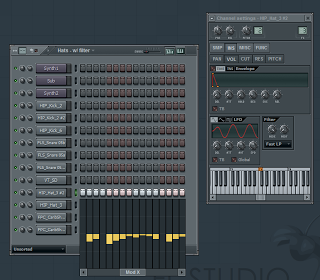
So the first thing you want to do is program some variation, starting with velocity:
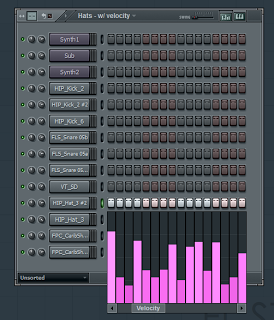
AudioPlayer.embed(“audioplayer_2”, {soundFile: “http://snugsound.com/blog/fruity-candy-2/02%20Hats%20-%20w%20velocity.mp3”, noinfo: “yes”});
Now, think about what happens when you hit a real hihat more softly – it’s a little more muted, a little less punchy. We can approximate something like this with a lowpass filter:
AudioPlayer.embed(“audioplayer_3”, {soundFile: “http://snugsound.com/blog/fruity-candy-2/03%20Hats%20-%20w%20filter.mp3”, noinfo: “yes”});
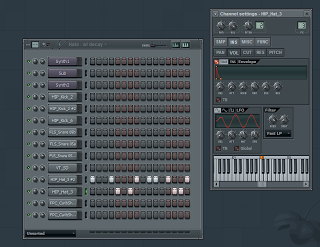
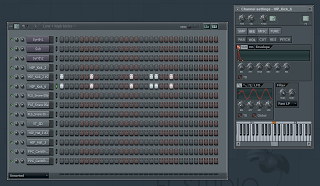
Also, a real hi-hat will decay more quickly when you hit it softly. We can replicate this by copying the first hihat channel and adjusting the decay of the volume envelope. We’ll use the original channel for the harder hits, and the new one for softer hits:
AudioPlayer.embed(“audioplayer_4”, {soundFile: “http://snugsound.com/blog/fruity-candy-2/04%20Hats%20-%20w%20decay.mp3”, noinfo: “yes”});
I’ve also removed a few notes to create a bit more push/pull.
Building kicks
The big kicks you hear in electronic music are usually the result of stacking/layering 2 or more kick samples. So for example, using the low-end from one and the punch from another.
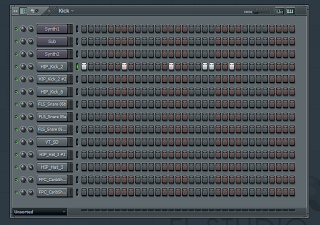
Let’s start with a simple, boomy kick. As you can see it doesn’t have a whole lot of high-end to it:
AudioPlayer.embed(“audioplayer_5”, {soundFile: “http://snugsound.com/blog/fruity-candy-2/05%20Kick.mp3”, noinfo: “yes”});
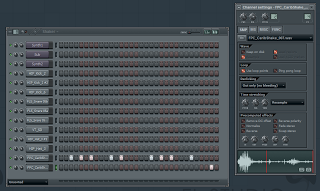
I’m going to layer a second kick with more high-end on top, but first I’ll use a lowpass filter to remove what little high-end the first one has. I’ll also increase the attack of the volume envelope to remove the initial transients (you’ll see why in a second):
AudioPlayer.embed(“audioplayer_6”, {soundFile: “http://snugsound.com/blog/fruity-candy-2/06%20Kick%20-%20w%20attack.mp3”, noinfo: “yes”});
Now, I’ll layer my 2nd kick and adjust the decay so we only get the attack portion of it
AudioPlayer.embed(“audioplayer_7”, {soundFile: “http://snugsound.com/blog/fruity-candy-2/07%20Low%20+%20high%20kicks.mp3”, noinfo: “yes”});
Basically, what I’ve done here is “cross-fade” between the two kicks using the volume envelopes.
Building snares
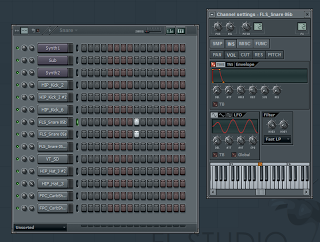
The same approach can be applied for snares, although in this case I just layer two of them outright and adjust the envelopes a bit to make them sound as if they’re gated. This helps to create more impact:
AudioPlayer.embed(“audioplayer_8”, {soundFile: “http://snugsound.com/blog/fruity-candy-2/08%20Snare.mp3”, noinfo: “yes”});
Ghost snares
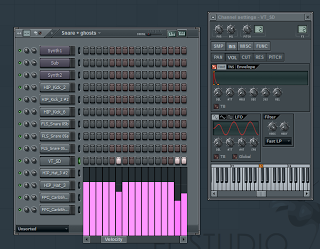
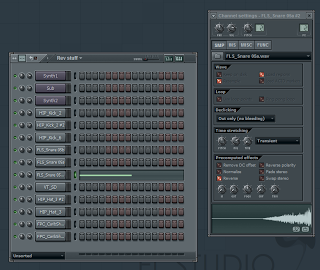
I’ve picked a complimentary snare, set a relatively short decay and applied the same concepts as I did to my hihats to create some movement:
AudioPlayer.embed(“audioplayer_9”, {soundFile: “http://snugsound.com/blog/fruity-candy-2/09%20Snare%20+%20ghosts.mp3”, noinfo: “yes”});
Looping
Try looping your samples to create some interesting rhythms. Here I’ve taken a shaker and used a cross-fading loop to make it sound as if somebody’s shaking it a couple times:
AudioPlayer.embed(“audioplayer_10”, {soundFile: “http://snugsound.com/blog/fruity-candy-2/10%20Shaker.mp3”, noinfo: “yes”});
Reversing and time-stretching
You can also achieve some interesting effects through reversing and stretching samples. For example, I’ve taken one of the snares, timestretched it a bit and reversed it (I did a few other things with it, see if you can pick them out):
AudioPlayer.embed(“audioplayer_11”, {soundFile: “http://snugsound.com/blog/fruity-candy-2/11%20Swing%20+%20rev.mp3”, noinfo: “yes”});
Swing
As you can probably hear in the above I added some swing using FL Studio’s “Master swing” control. Note that this only applies swing to the step sequencer, however, so if you want to add swing/groove to the piano roll you’ll need to use the Piano Roll Quantizer.
Just for fun
Okay so I’ve added a bit of bass stuff for fun and put it all together:
AudioPlayer.embed(“audioplayer_12”, {soundFile: “http://snugsound.com/blog/fruity-candy-2/12%20With%20bass.mp3”, noinfo: “yes”});
It’s… some kind of dubstep… eh?
What’s next?
Download the FL Studio project and poke around. You’ll see I’ve used EQs and limiters in places to do a rough mixdown. That’s outside of the scope of this particular article, but I would encourage you to read up on using compressors and equalizers to mix your tracks.
Until next time…
Update – Jan 17
I received the following feedback from a user on the Image Line forums, which I will try to integrate shortly:
…when using two different kick samples, they may also have differing fundamental pitches.
When two kick drums with different fundamentals sound at the same time, you will either get some rather tasteless distortion or they will sound very disconnected (depending on how much is cut or shared between them) and it is very apparent on a PA and high-end consumer equipment.
So use a FFT or similarly functional spectrum analyzer on your kick samples to find their fundamental pitches and correct them to sound at the same pitch class
It also doesn’t hurt to do the same thing for the snares, but sometimes the distortion is wanted there so it’s up to taste.

