Review: Numark NS6

Preface

So after a couple years of DJing with Ableton Live using my Allen & Heath Xone:2D I’ve decided I don’t like it. It’s not fun.

Don’t get me wrong, I love Ableton Live, but as a DJ platform it’s clunky. Sure there are some definite pros to DJing with Live but personally I feel the cons outweigh them.

So based on the above, plus a decent tax return, I decided to pick up the Numark NS6.

Numark NS6

First impressions

My decision was really down to the Traktor Kontrol S4 or NS6. I didn’t get a chance to play with the S4 first hand but I was able to compare an S2 and the NS6 side by side.

Coming from a vinyl background the NS6 felt much more natural to me, probably in large part due to the long pitch faders and bigger platter. Setting cue points was extremely intuitive – more so than the S2 – and I was able to start mixing immediately without so much as a glance at the manual.

In-depth

Hardware

The NS6 has all the outputs you’d expect: two main outputs (RCA and XLR) and a booth output (RCA only). The mixer layout is fairly compact which may throw some people off, but the knobs and faders feel sturdy.

One nice addition is that you can also use the NS6 as a conventional mixer: the two main channels offer switchable line/phono inputs while the other two offer switchable line/mic inputs. Realistically I’m not sure how practical this would be in a club setting as more than likely you would be plugging the NS6 into the house mixer alongside any turntables or CDJs, but it’s still a nice addition nonetheless.

I do have a gripe with the placement of the ground connection, however. It’s at the far end of the inputs rather than being in between the two phono inputs. Depending on your cabling this could be quite a nuisance (it was for me, anyway).

NS6 rear view

Where the NS6 really excels is with its large high-resolution platters, long pitch faders and “strip search” (track scan) ribbons. For me these three things combined rivalled playing on vinyl.

Software

I have to admit I had never actually used Serato before though I had seen it so I knew what to expect. The layout is fairly intuitive so it didn’t take me long to get used to it.

Most of the gripes I have with the NS6 are with the ITCH software, and not with the controller itself. For example, the key lock (“Master tempo”) algorithm is very glitchy – it’s more akin to Live’s “beat” warp mode than something as smooth as Complex or Complex Pro. From what I’ve read, Serato Scratch has far superior key lock but ITCH is always a few feature cycles behind.

The FX are also lacklustre. The HP and LP filters are fine but, for example, the reverb is horrendous to the point where it’s not usable. Some of the other FX also felt a bit too gimmicky for me.

One thing I was pleasantly surprised with, and which seems to be a feature specific to the NS6/ITCH combo, is the “bleep” reverse mode. Basically, it does a momentary reverse of the track without throwing off the playback location. This allows for some very interesting mixing possibilities, and it’s something I have to restrain myself from going overboard with because it’s just so much fun! There is a caveat with this feature, however: it’s accessed by pressing the shift button followed by the reverse button. If you forget to press the shift button first the playback will go into full-on reverse mode. It’s unfortunate they didn’t do this the other way around, as accidentally putting a track into reverse mode is not something you can easily recover from when you have another track mixed in.

Serato ITCH

Integration

The integration with Serato ITCH is extremely tight. Once you’ve got music loaded into your library you won’t need to touch your laptop. At all. Navigating your library is a breeze and you can even do some limited searching using the buttons on the NS6.

While I occasionally had issues with my Xone:2D registering itself with Windows 7, the NS6 connectivity has been flawless. I’ve never had to mess around with different USB ports, reboots, or anything else.

NS6 with ITCH

Summary

The good:

  • good build quality
  • high resolution jog wheels (“the best on the planet”)
  • long pitch faders

The bad:

  • software lacking in several areas (keylock, FX)
  • short faders may turn some people off
  • some questionable design decisions, such as placement of ground connections

Overall I would highly recommend the NS6. Whether you are just getting into digital DJing, or a seasoned veteran, I think you will be pleasantly surprised. While some of the issues with the software do put me off a bit I have my fingers crossed that they will be resolved with time.

Hardware integration with Ableton Live

MIDI integration is notoriously lacking in Ableton Live. For example, you can’t store SysEx data at the start of a song (i.e. to store a patch dump), you can’t automate CCs in the Arrangement view, etc. Couple this with some of the other caveats of dealing with hardware (latency, MIDI timing errors, drop-outs) and it can make for a very frustrating experience.

But we love Ableton Live and want to get the most out of it, so in this post I will explore some options to tighten up timing, automate your external hardware seamlessly from the Arrangement view and generally have a much more enjoyable experience when working with MIDI devices.

Timing is everything 

The first thing you should do if you haven’t already is set your Driver Error Compensation. Contrary to some other articles on the internet this is not simply a matter of entering a negative value to reduce your Overall Latency to 0ms!

Wrong way!

Rather, what you are trying to do is tell Live how “truthful” your audio interface is being about latency. Doing so will allow Live to automatically compensate for delay more accurately (more on this later).

Ableton includes a tutorial and sample project that will help you set this value properly. To access it:

  • From the top menu: View -> Help View
  • In the Help section, “Show all built-in lessons”
  • Select “Driver error compensation”
  • Follow the steps

Note that you should repeat the above steps whenever you change your audio interface or Buffer Size.

Take Control

When I first started incorporating hardware into Live I was doing things the “hard way”: creating separate MIDI and audio tracks and then recording the audio signal from my synths before doing a final mixdown/render. There are some advantages to this,
such as being able to warp/process the audio, but the downside is that all delay compensation needs to be
done manually.

The “right” way to incorporate hardware (as of Live 7, I believe) is to use its respective devices/instruments: External Instrument and External Audio Effect. These instruments will take care of several things for you:

Firstly, they will account for latency. If you’ve properly set your Driver Error Compensation per the above you should have almost no latency relative to your soft-synths and audio tracks. Basically, what Live is doing is delaying everything else to give your synths time to catch up.

You will notice that these instruments provide a Hardware Compensation value: this is to account for actual hardware latency (i.e. the amount of time it takes your synth to respond to a note, MIDI I/O)

Secondly, these devices will take care of recording the output from your hardware automatically when you bounce your track:

Real-time rendering

Unfortunately, what these Live devices don’t provide is a way to automate CCs from within the Arrangement view. There are three possible approaches to this, described below.

Clip envelopes

This is the “default” way of working with CCs in Live. Unfortunately, you can’t “see” clip envelopes on the Arrangement view nor can you name the CCs.

Where are you going with this… ?

So let’s say you’re trying to create an epic acid line rise/fall. All you can really tell from the clip view is that  “MIDI CC 74 is climbing towards bar 64”. This doesn’t cut it for me. To me, clip envelopes only really make sense for modulation and pitch bend, and that’s all I will use them for. Moving on…

VSTs

There are several VSTs out there that allow you to control specific hardware devices (both my DSI Tetra and Little Phatty have VSTs, for example). These work by taking control of your MIDI I/O on behalf of your DAW. So when Live sends a “note on” to the plugin, the plugin will the relay this to the hardware. And vice versa.

Because these VSTs generally provide controls for all of the synth’s parameters (cutoff, resonance, etc.) it means you can automate them in the same manner as you would other virtual instrument parameters. In other words, you can automate them from the Arrangement view! As an added bonus, these plugins generally store the “state” of all parameters, so when you reload your project you will get the same patch (even if it’s not saved as a patch on the synth)

Little Phatty VST

The main caveat with these plugins is that, because they take control of MIDI I/O, you can no longer use Live’s External Instrument device.

There is a workaround involving loopbacks/virtual MIDI ports, but a far simpler workaround is to simply use Live’s External Audio Effect and only choose an input channel. This will force Live to perform real-time rendering, however, it will no longer automatically compensate for latency so you will need to apply a negative track delay on your MIDI track (see “Tighten Up” below).

Note that if  a VST doesn’t exist for your hardware there is an open-ended plugin called CTRLR that’s worth checking.

Tighten up

As I mentioned earlier, Live’s External devices allow you to enter a Hardware Delay. Assuming you aren’t using a VST to control your hardware then you can use this to tighten up timing even further. (If you are using a VST you will need to use a negative track delay on your MIDI track, but otherwise the below applies)

The process for identifying your Hardware Latency is the essentially the same process as determining your Driver Error Compensation. Here are the steps I used:

  • Load a patch with an instant attack on your hardware device (basses or kick drums are good)
  • Sequence a couple notes in your MIDI track (say, beats, 1, 2, 3 & 4)
  • Render the project to WAV
  • Drag the audio track into a new channel in Live and turn off warping

Look at the waveform produced by the synth: does it line up with the 1, 2, 3 & 4 beat markers? In my case it didn’t.

Test loop with audio for comparison

Edit the bounced audio clip and adjust the right-most digit until it lines up. This value is the value for your Hardware Latency, or negative track delay (edit Sept 2013: one thing to keep in mind with track delays is that they affect playback, not recording, therefore you would need to include an extra bar before your MIDI phrase to ensure that the full audio gets captured when the track is rendered or frozen)

Adjusting clip start point

Re-bounce the audio and everything should line up now. Perfect timing!

Update September 2013: I’ve written a similar blog post for Sonic State that provides some additional thoughts on using Instrument Racks and Max4Live to automate CCs from the arrangement view. You can check it out here

Free Minimoog! (VST)

The nice folks over at Arturia offering a free Minimoog VST tomorrow:

On June 21st, World Music day, we are glad to offer you a commemorative version of the Minimoog V called Minimoog V original.

Functions behind the front panel are not available but all sounds and features from the Minimoog V2.5 (a $229/219Eur product) are included. Just like the original Minimoog.

Arcadia Sound heads west

Well… somewhat west, anyway. We’ll be doing shows in Montreal and Ottawa next week/weekend. Here are the details for those:

  • Thursday May 3th: Montreal @ Piranha Bar w/ Snug, Velvet Glacier & Jacqueline Dumont (Facebook event
  • Saturday May 5th: Ottawa @ Dekcuf w/ Snug, Trees & Haze vs. Fiver (Facebook event

We’ll be debuting some new music as well as a new light show synchronized with our set (assuming my laptop doesn’t explode due to the sheer amount of awesomeness involved).

I’ll also be dropping a Snug DJ set on CHUO.FM Friday night (overnight) so be sure to tune in for that if you happen to be awake.

ECMA electronic no-case showcase

If you’re in the Moncton area for the ECMAs this week swing by the Aberdeen Cultural centre Thursday night for an urban/electronic no-case showcase. I’ll be dropping a couple Snug tunes (live), with James Spray on keys, and then we’ll be switching modes and performing a few Arcadia Sound tunes. Should be a time!

Head on over to the Facebook event page for more info or to toggle your attendance.

Arcadia Sound debut EP out now!

Well after a few busy/stressful weeks it’s finally done and available now on our Bandcamp page.

For the nerd/gear head out there:

  • the vox were all recorded at my home studio through an AKG C414, Universal Audio SOLO/610 pre and MOTU Audio Express interface
  • guitar was all direct, most of it through a little ART tube pre
  • recording and mixing was all done in Ableton Live
  • I’m sad to say that, despite owning several analog synths, everything on the record is digital (and mostly software!). Bob Moog would be disappointed in me, I know.

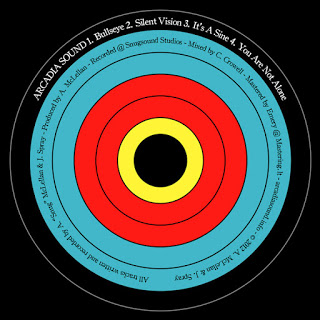
I’ll add pics of the actual physical product soon but in the meantime here’s the design of the CD:

We’re really stoked to be sharing our music with the world and hope you like it.